What Are the Different Holster Draw Techniques?
Sep 22nd 2023
While regular shooting practice and proper holster selection are essential, a third skill is necessary to be a safe and responsible concealed carrier: holster draw techniques. Drawing a handgun from a holster involves a series of coordinated actions that allow the user to quickly and safely bring the weapon into a firing position. Draw techniques vary depending on the style of the holster, the type of firearm, and the situation.
Why Practicing Holster Draws is Essential
Whether you carry IWB or OWB, with a standard belt holster, an appendix holster, or a retention holster, you need holster draw practice. Knowing how to draw your handgun from the holster is essential for any shooter. It allows you to present your gun safely and quickly when the situation requires it.
Holster draw techniques link the two other essential skills needed to carry a handgun: concealed carrying techniques and raw shooting skills.
Even if you are an expert at keeping your handgun concealed or an accurate shot, neglecting to practice holster drawing puts you and others at risk. Improper holster draws increase the risk of fumbling, snagging your gun in your clothes, or accidentally discharging it at yourself or a bystander.
Researching and practicing proper holster drawing methods appropriate for your holster type will help you become a faster, safer, and more responsible shooter.
Determining Your Holster Type
The type of holster you have determines the steps you must follow to draw your gun correctly, especially before gripping and pulling the handgun out.
Here’s how to recognize some of the most common holster types and the main challenges of drawing your handgun from each.

Inside the Waistband (IWB)
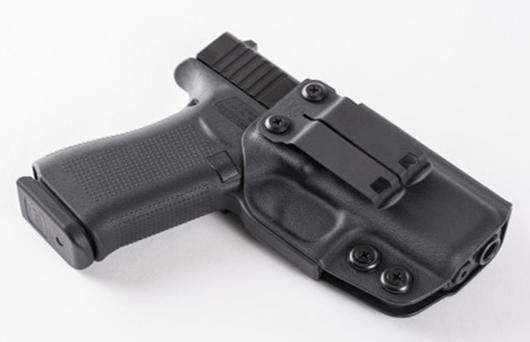
The traditional belt-mounted, inside-the-waistband (IWB) holster is among the most common choices for concealed-carrying citizens. IWB holsters like the Incognito Concealment T3 are recognizable by the orientation of the holster shell: it is designed to sit on the inside of your waistband, with the belt clips on the outside.
When wearing an IWB holster with the handgun inserted and properly concealed, you should be able to wear a cover garment, such as a shirt, tucked into your waistband. While this allows you to conceal smaller models such as compacts and subcompacts, it also adds an extra challenge to the holster draw stroke.
The primary challenge of drawing from IWB is learning to pull clothing out of the way consistently, also known as clearing your cover garments. IWB holsters often require clearing multiple cover garments to reach and grip your handgun. For example, you may need to push a sports jacket out of the way, then pull a tucked-in shirt high enough to reveal the holster.

Outside the Waistband (OWB)
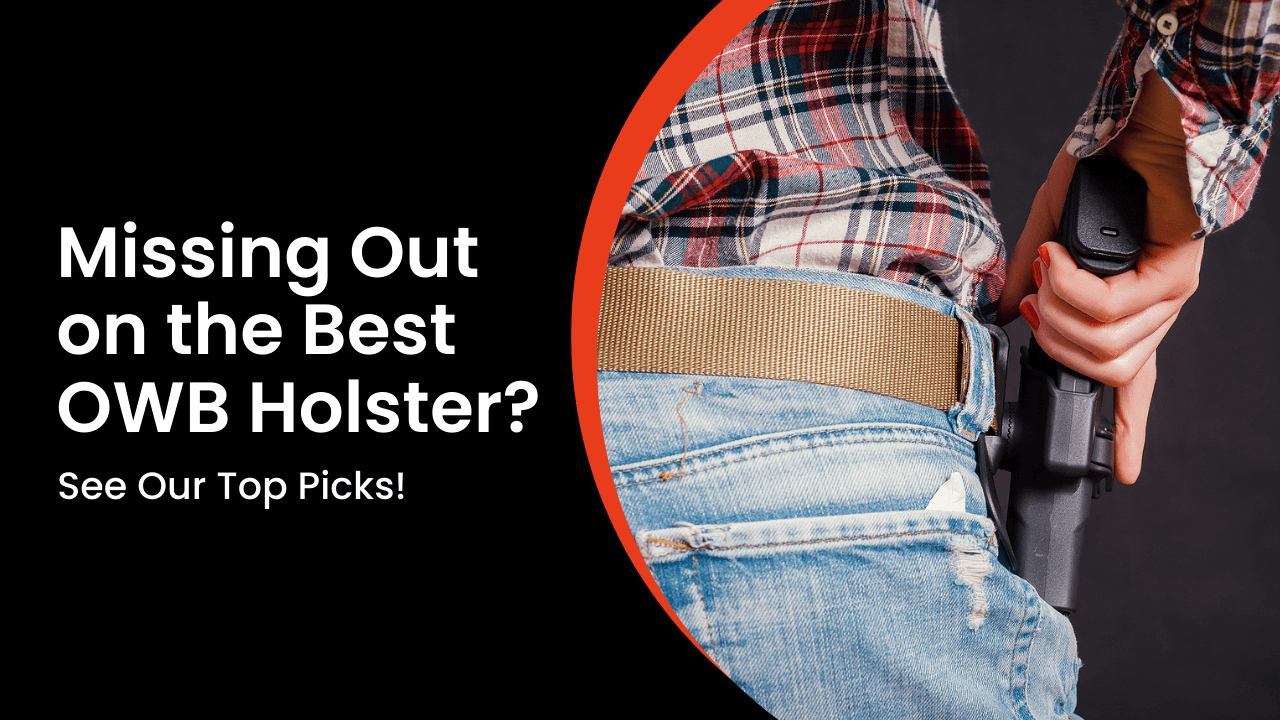
Belt-mounted, outside-the-waistband (OWB) holsters are another popular choice for concealed carrying or general-purpose applications. The holster shell orientation is the reverse of an IWB holster: the belt clips are on the inside, allowing your handgun to hang on the outside of your pants.
Many OWB holsters are low-profile models meant for concealed carry, such as the Incognito Concealment Venture. They feature slim holster shells and a lightweight construction to minimize your gun’s profile.
While keeping a handgun in an OWB holster concealed can be more challenging, one of the main advantages is easier draw strokes. With an OWB holster, your cover garments drape over your holster instead of being tucked in and over your gun. Clearing them is easier because you only need to push them out of the way instead of pulling them out of your waistband.

Appendix Inside the Waistband (AIWB)
Appendix IWB holsters, or AIWB holsters, are a popular variant of the classic IWB holster. They are designed for a specific carry position called appendix carry, where your gun rests directly in front of your body, on or around the 12 o’clock position.
Some AIWB holsters, such as the Incognito Concealment 2-Piece Rig, also integrate a magazine carrier into their design. They give you ready access to your gun and extra ammunition in the same place.
The essential principles of AIWB holster draws are similar to those of a standard IWB holster. The main differences are due to the carry position; if you find it more comfortable to draw from the appendix position, it may help you clear your cover garments faster and more efficiently.
Retention Holsters
A retention holster, also known as a security holster or duty holster, is a specific type of OWB holster. It is not intended for concealed-carrying; instead, they are open-carry holsters meant for duty applications, such as law enforcement, military, or security.
You can easily recognize a retention holster by its additional security mechanisms and the “Level” designation, which indicates the level of security it provides. A traditional, non-retention holster is considered Level 1 because it only provides passive retention with the holster shell’s friction.
Retention holsters are Level 2, 3, or 4, depending on the number of retention mechanisms. A Level 2 holster like the Incognito Concealment Level 2 has passive retention and one active retention mechanism. Level 3 holsters have two active retention systems, and Level 4 holsters have three.
The more active retention mechanisms are in place, the more mechanisms you must manipulate to draw your handgun. While they complicate the holster draw, these systems increase security by making it harder for an assailant to steal your gun.
Common active retention systems include:
- Thumb breaks or retention loops prevent you from drawing the handgun until you rotate or fold it open.
- Trigger guard locks are active locking devices that grab the trigger guard or the ejection port. They physically retain the gun inside the holster until you disengage it by pressing the button or lever.
- Altered draw mechanisms prevent you from drawing your handgun directly unless you first perform an additional “unlocking” move. For example, some holsters require you to press down, as if pushing the gun further into the holster, before you can pull it up and out.
Basic Step-by-Step Holster Draw Technique
Once you understand the specifics of your holster type, you can start practicing basic drawing techniques. A standard pistol drawing technique assumes you are standing, facing your threat, and wearing an OWB or IWB belt-mounted holster.
What Do I Need to Practice Basic Holster Draws?
Wear your gun belt and holster as usual. Then, ensure your firearm is fully unloaded before beginning. If you wish, you can load snap caps or dummy rounds. Consider using brightly-colored ones to minimize the risk of mixing them with live ammunition.
Never use live rounds when practicing holster draws unless you are in a safe environment, such as a range or a training facility. Even if you aren’t using live ammo, remember the rules of gun safety, especially when repeatedly drawing and re-holstering your gun.
Step 1: Reach Your Handgun
Use your dominant hand to reach for your gun as naturally as possible. If you carry concealed, use your non-dominant hand to clear your cover garments. The exact moves you will need to perform depend on the clothes you wear and the carry position you select. Here are a few representative examples:
- Concealed IWB holster under a tucked-in shirt: Reach for the side of your shirt over your holster with your non-dominant hand. Grab the shirt as low as you can comfortably reach, then pull it up and hard to clear your cover garments. When your holster is accessible, reach for your gun with your dominant hand and prepare to wrap your hand around the grip.
Ensure your shirt cleanly leaves the gap between the holster shell and your belt clips without snagging. If you are wearing a vest jacket over your tucked-in shirt, you may need to use your dominant hand to lift your jacket up and out of the way of the holster.
- Concealed OWB holster: Determine the best way to open or lift your cover garment with one hand. If you’re wearing a lightweight or relatively loose-fitting long shirt, suit jacket, or vest, you may be able to use a similar clearing technique as with an IWB holster. Use your non-dominant hand to lift the garment, then grab your gun with the dominant hand.
If your cover garment is tighter-fitting, longer, or heavier, such as a long outdoor coat or a tailored vest, you may need to open it first with your non-dominant hand. Once your garment is open, reach inside with your dominant hand, then grab your weapon.
Step 2: Draw Your Handgun
Once your hand is on the grip of your handgun, wrap your middle, ring, and pinky fingers around the grip to get as firm a grip as possible. Depending on your gun, you might not be able to wrap your thumb on the other side yet. Let it rest on the back of your slide or hammer instead, and keep your index (trigger) finger fully extended.
If you’re wearing a retention holster, perform all necessary steps to disengage your holster’s active retention mechanisms. Pull your handgun up once you have a good grip to release it from your holster. A tight and secure grip is necessary to avoid fumbling or dropping your gun.
Depending on the holster type and cover garments, you may need to continue holding your garments up with your non-dominant hand until your gun has fully cleared the holster. Be cautious during this stage; releasing your garments too early increases the risk of snagging or being unable to pull your handgun entirely out of the holster.
Step 3: Rotate Your Gun Toward the Threat
After releasing your gun from the holster, rotate your elbow until the muzzle points toward the threat. Your movements should feel natural and comfortable. Don’t preemptively rotate your wrist to bring the muzzle up faster; if you need to fire early, doing so risks causing a limp wristing malfunction.
With your non-dominant hand, continue holding up or pushing your cover garment out of the way until your elbow has fully rotated and your muzzle is pointing downrange.
Step 4: Transition to a Two-Handed Grip
Once you are pointing your gun at the threat, now is the time to complete the transition from drawing to aiming. While keeping your weapon close to your body, muzzle pointed downrange, let go of your cover garment with your non-dominant hand, then bring it to your gun’s grip. If done correctly, you should join your hands into a two-handed grip.
Only once you have a full two-handed grip should you extend your arms forward and transition into the stance of your choice. For instance, you can begin adopting firing stances such as Isosceles, Weaver, Fighting, Center Axis Relock (CAR), or any other two-handed shooting stance you prefer.
Regardless of your stance, now is the time to focus on your sights and aim at the threat. Remember the fundamentals of sight alignment and trigger control; shoot only when ready.
Advanced Draw Techniques
As you gain confidence practicing the basics, you may consider learning more advanced techniques. Here are some of the most common advanced holster draw techniques and their real-world applications.
Drawing with One Hand
Drawing a handgun with one hand, particularly from concealment, can be helpful for various reasons. For instance, one of your hands may be busy holding a mobile phone to call the police, opening a door, or holding another object, such as a flashlight. In these situations, knowing one-handed draw strokes can be life-saving.
Assuming you are standing, facing a threat, and carrying IWB, the essential steps of a one-handed draw stroke are as follows:
- Reach for the bottom of your shirt or cover garment, then hook it with a four-fingered hold.
- Lift the shirt to approximately chest or pectoral level.
- While holding your shirt, slide your hand to the side of your body over your holster’s location.
- Transition from hooking your shirt with four fingers to holding it up with an extended thumb, then progressively lower your hand toward the grip of your handgun.
- Grab your handgun’s grip while keeping your shirt out of the way with your thumb.
- Draw your handgun and allow it to clear the holster, then present the muzzle on the target with one hand.
- Transition to the one-handed or flashlight and gun stance of your choosing.
Drawing From a Seated Position
Many self-defense situations may require drawing from a seated position, such as while driving your car or at an office.
Whether you carry IWB or OWB, the general principles of drawing from a seated position are similar to drawing while standing. The main differences are the body positions you must adopt to clear your cover garments, which vary depending on the carry position.
- Strong-side hip carry: Use your non-dominant hand to pull your shirt or cover garment up and to the center of your chest. Then, lean forward as much as possible before gripping your handgun and pulling it out.
- Appendix carry: Follow the same steps, but lean your body back instead. Leaning back to draw a handgun in the appendix position will make it easier for you to extract it from the holster.
- Behind the hip or small of the back: These carry positions place your handgun behind your body, which makes it more challenging to draw a gun safely. Avoid these carry positions if you expect to draw from a seated position. Alternatively, use a paddle holster like the Incognito Concealment Ergo to adjust your position on the fly and switch as needed.
Where and How to Practice Holster Draw Techniques
As with shooting, regular training and practice are crucial to becoming proficient with your preferred holster draw technique. Live-fire practice is recommended to train the holster draw and your shooting fundamentals. However, you can also perform dry-fire drills to practice your draw safely at home.
Tips for Dry Practice at Home
Using an unloaded firearm is the easiest solution to practice your preferred draw technique at home. You can also load your firearm using snap caps or inert dummy rounds, especially if you cannot dry-fire your gun without damaging the firing pin.
Consider practicing in front of a mirror. It can help you visualize your movements more easily and ensure you perform each step of your drawing technique correctly. You can also view whether your gun is about to snag on your clothes, helping you correct mistakes.
If you’re a beginner, practice each step individually and slowly. Work your way up to doing it more quickly. Slow and deliberate practice of each movement lets you understand each step more easily, avoid skipping crucial parts, and reduce the risk of fumbling.
Once you gain more confidence, try practicing the entire draw technique until you can perform it as quickly as desired. You can use a shot timer or a stopwatch to measure how fast you can perform your preferred draw technique.
Practice and Training Outside the Home
If you want to practice your holster draw techniques with live ammunition, you typically need to visit a range or a training facility where it is allowed. Not all shooting ranges allow you to draw or carry a gun in a holster. Ask the local range safety officers for permission before practicing your draws at the range.
The easiest solution is to take a shooting class dedicated to training holster draws or concealed carrying techniques. They are supervised by professionals who can help you refine your basics and learn more advanced techniques.
Become a Safe and Responsible Gun Owner with Incognito Concealment
At Incognito Concealment, we support the Second Amendment rights of every law-abiding citizen. We encourage every gun owner to be as safe and skillful as possible, whether you practice shooting fundamentals or holster draw techniques.
We offer an extensive range of IWB and OWB holsters suitable for concealed carry, allowing you to practice as many draw strokes as possible. Our concealment holsters are compatible with hundreds of gun models from the world’s top manufacturers. Contact us to learn more about our product line or browse our blog for more concealed carry tips.
Disclaimer: The information provided in this article is intended for informational and educational purposes only. It is not a substitute for professional training, legal advice, or adherence to local, state, and federal laws concerning firearm ownership and concealed carry permits.
Before making any decisions regarding concealed carry, it is crucial to consult with qualified professionals and to fully understand your responsibilities and the laws that govern concealed carry in your jurisdiction.


